Marksman guide · Chapter 2

Your first Range Session

A Range Session is one trip to the range, saved to one rifle: what you shot, how far, and what the target says. It is free on every plan, and it is the part of Qual8 you will use most.

MarksmanSharpshooterHandloader

At home

Before you leave for the range

Your rifle and ammunition, already in Qual8

Range Setup will not start until you pick the ammunition you are shooting, and ammunition is saved on a rifle. If you have not added them yet, do Get set up first.

A target

A Sigma8 target is the easy one: Qual8 finds the holes for you. Any Sigma8 sheet works for any number of groups: start at the first bull and work in order, and Qual8 ignores the bulls you did not shoot. Put every group for the session on one sheet. Print at actual size on matte paper. Your own paper target or a steel plate also work; you mark the hits yourself.

Download targets, free →
Your chronograph, if you use one

Range Setup asks Yes or No. With No, you get every group number. With Yes, you also type each shot's speed and get velocity results.

Your phone

You photograph the target with it at the end. A dark, flat surface to lay the target on helps.

At the range

Eight steps, from Setup to a saved result

1

Open Range Setup

  1. Press SHOOT in the bar at the bottom of any screen.
  2. Find RANGE SESSION and press START RANGE WORK.
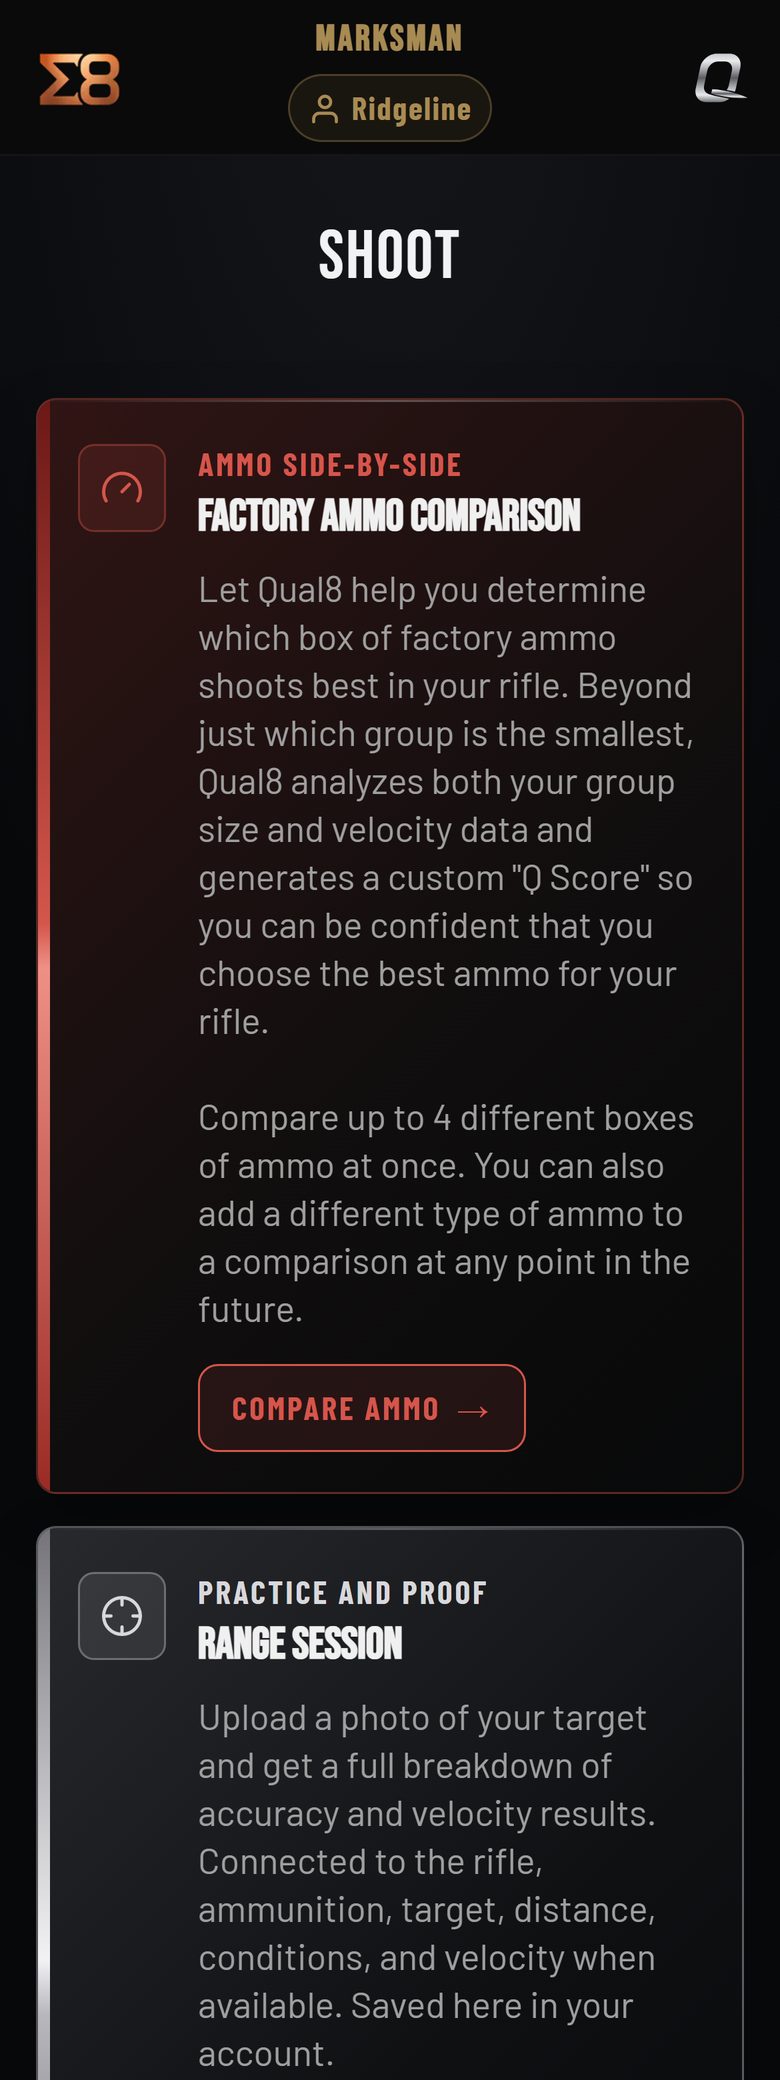
The Shoot screen on a phone, with the Factory Ammo Comparison and Range Session tiles.
The Shoot screen. Range Session is the second tile.

2

Fill in Range Setup

It is one screen, top to bottom. A star on the screen marks what Qual8 must have.

  1. Chronograph *: Yes or No.
  2. Rifle: press Change if it is not the rifle on the bench.
  3. Ammunition *: press the box you are shooting.
  4. Barrel cleaned? and Rounds fired before Group 1: count every sighter and fouler.
  5. Distance (yards) *, Number of groups *, Shots per group *.
  6. Target *: Sigma8 target, Your own target, or Steel plate.
  7. Conditions and Range Session Notes are yours to fill in or skip.
  8. Press START RANGE SESSION.

One target for the whole session. A Range Session takes one photo, so every group goes on the same sheet. A second sheet is a second Range Session.

Why this comes first

Qual8 keeps a round count for the barrel. The sighters and foulers you enter here are counted with the groups, so the barrel's round count and shots since cleaning stay right from your first session.
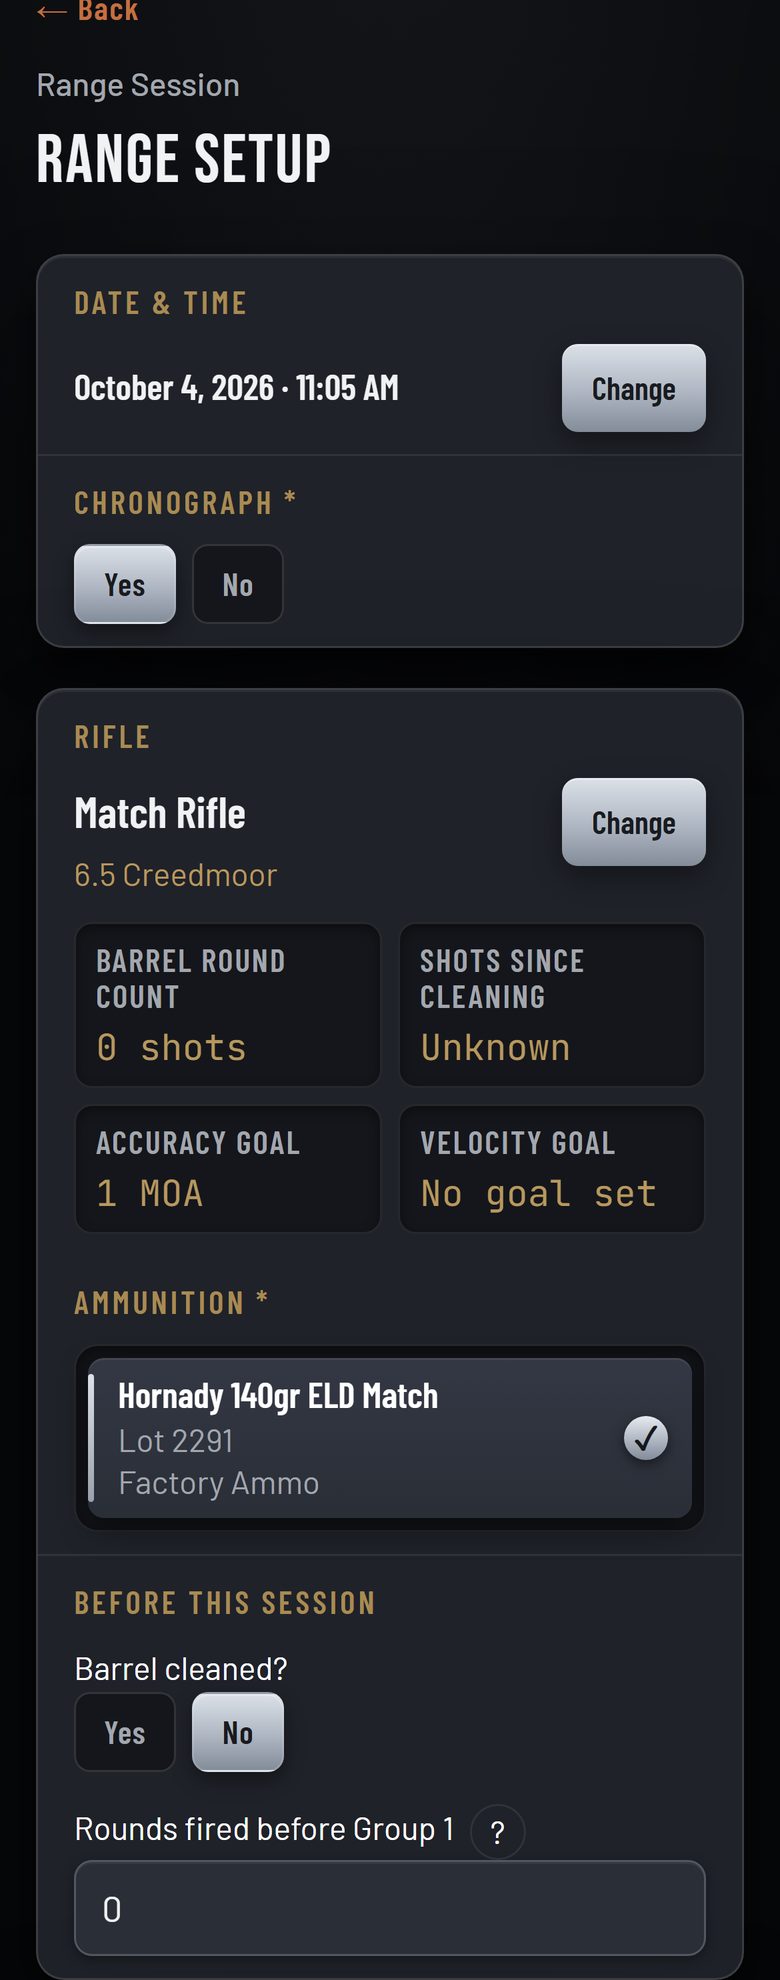
Range Setup on a phone: chronograph Yes or No, the rifle with its barrel round count, the ammunition, and the questions about cleaning and rounds fired before Group 1.
Range Setup, top half: chronograph, rifle, ammunition, and what the barrel did before Group 1.

3

Shoot your groups

The Range Session screen stays open on the bench while you shoot. It saves as you go.

  1. Shoot Group 1.
  2. If you fired more or fewer shots than planned, change Shots for this group with − and +.
  3. With a chronograph, type each shot's speed.
  4. Press GROUP 2 and carry on.

Need to stop? Press SAVE & RETURN LATER. The session waits for you under SHOOT, All Sessions.

Sharpshooter and Handloader: this screen also shows Track Cold Bore Response (CBR). That is its own chapter: Cold Bore Response.
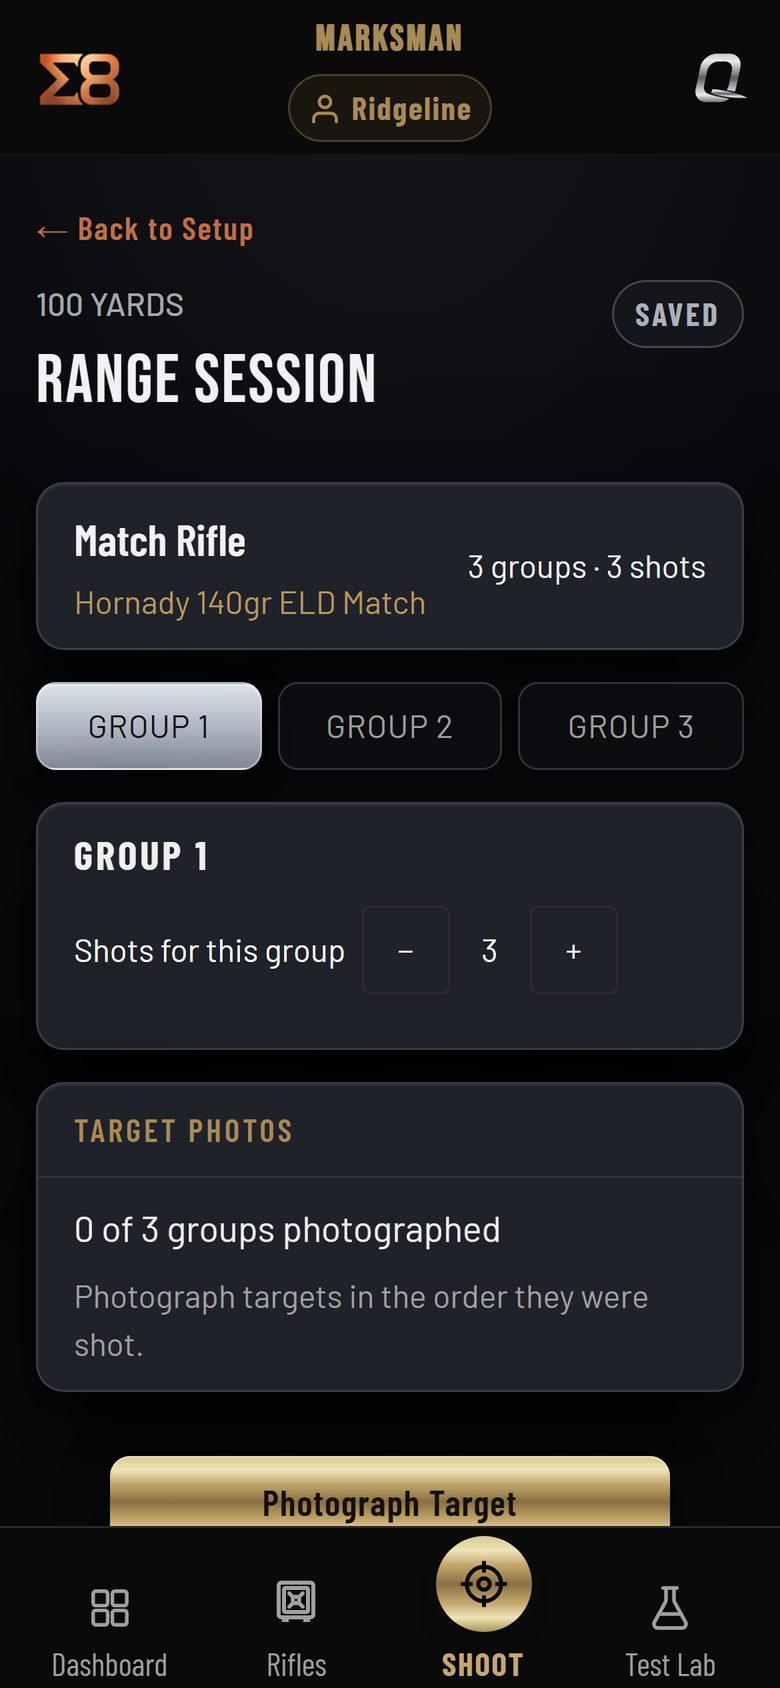
The Range Session screen: the rifle and ammunition, a tab for each group, the shot count for the group, and the Photograph Target button.
The Range Session screen, with a tab for each group.

4

Photograph the target

  1. Bring the target back and lay it flat on a dark surface.
  2. Press Photograph Target.
  3. Use 2X zoom. Get the whole sheet in the picture. Do not crop it.

Why the photo rules matter

Qual8 reads the patterns printed around a Sigma8 target to set the scale and straighten the photo. They have to be in the picture.

The screen's own list, word for word: "Clean dirt and fingerprints from the camera lens. Lay target flat on a dark surface. Do not write on targets. USE 2X ZOOM. DO NOT CROP."
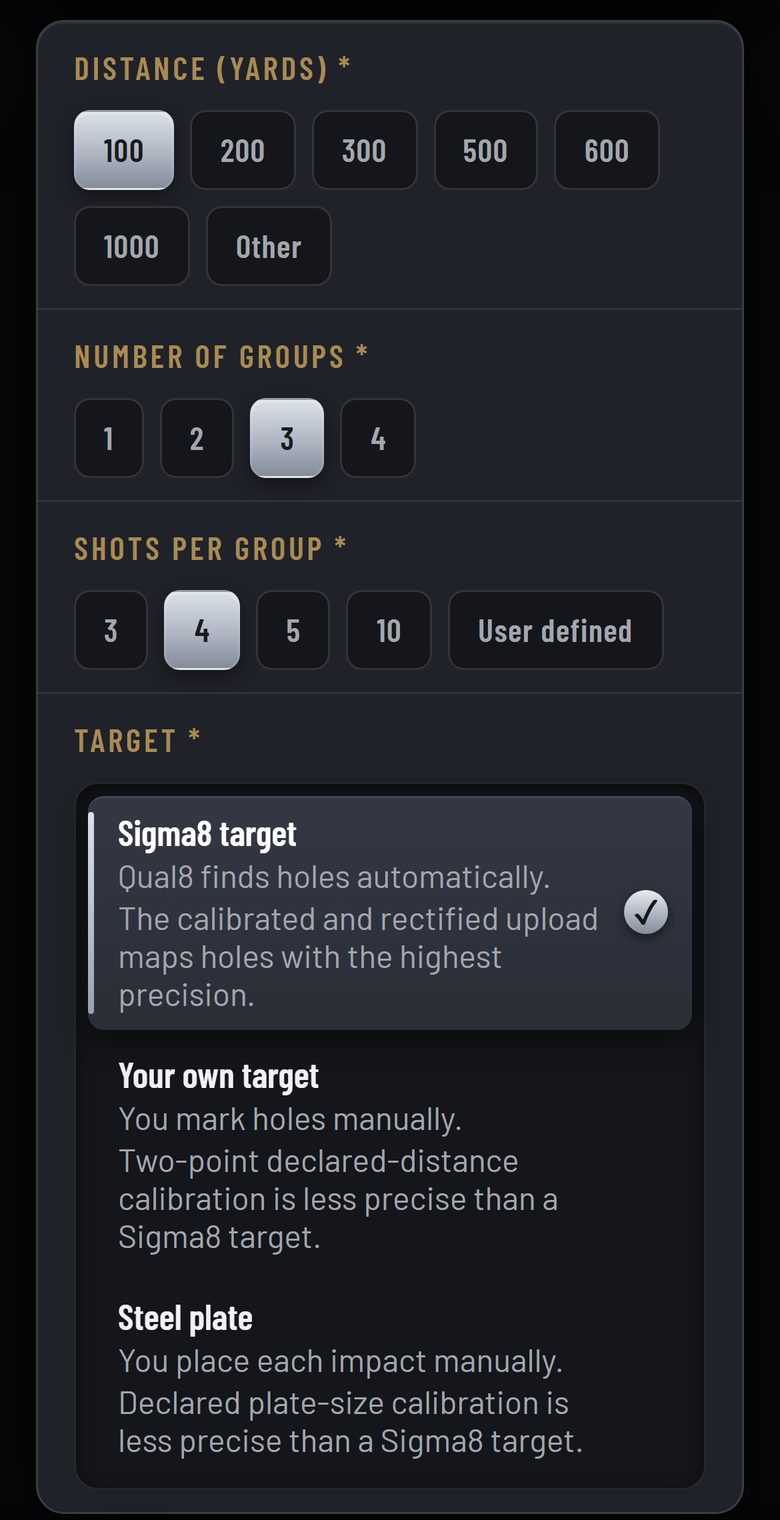
Range Setup on a phone: distance, number of groups, shots per group and the three target choices.
The target you chose in Range Setup decides what happens to the photo: a Sigma8 target is read for you; your own target or steel is marked by hand.

5

Check the holes

On a Sigma8 target, Qual8 shows the holes it found. You make it right.

  1. Look at each group. Every hole should carry a mark.
  2. A hole was missed: press + shot, then press and hold on the photo. A magnifier shows what is under your finger. Slide to line it up and lift to place the hole.
  3. A mark is in the wrong place: touch it and move it, or select it to remove it.
  4. When every group reads right, press All shot locations are correct.

Your own paper target: mark two points you measured, at least 6 inches apart, then where you aimed, then each hole. Steel: choose Round or Other, tap the plate's left and right edges, give its size, confirm the aim point, then mark each hit. How Qual8 measures →
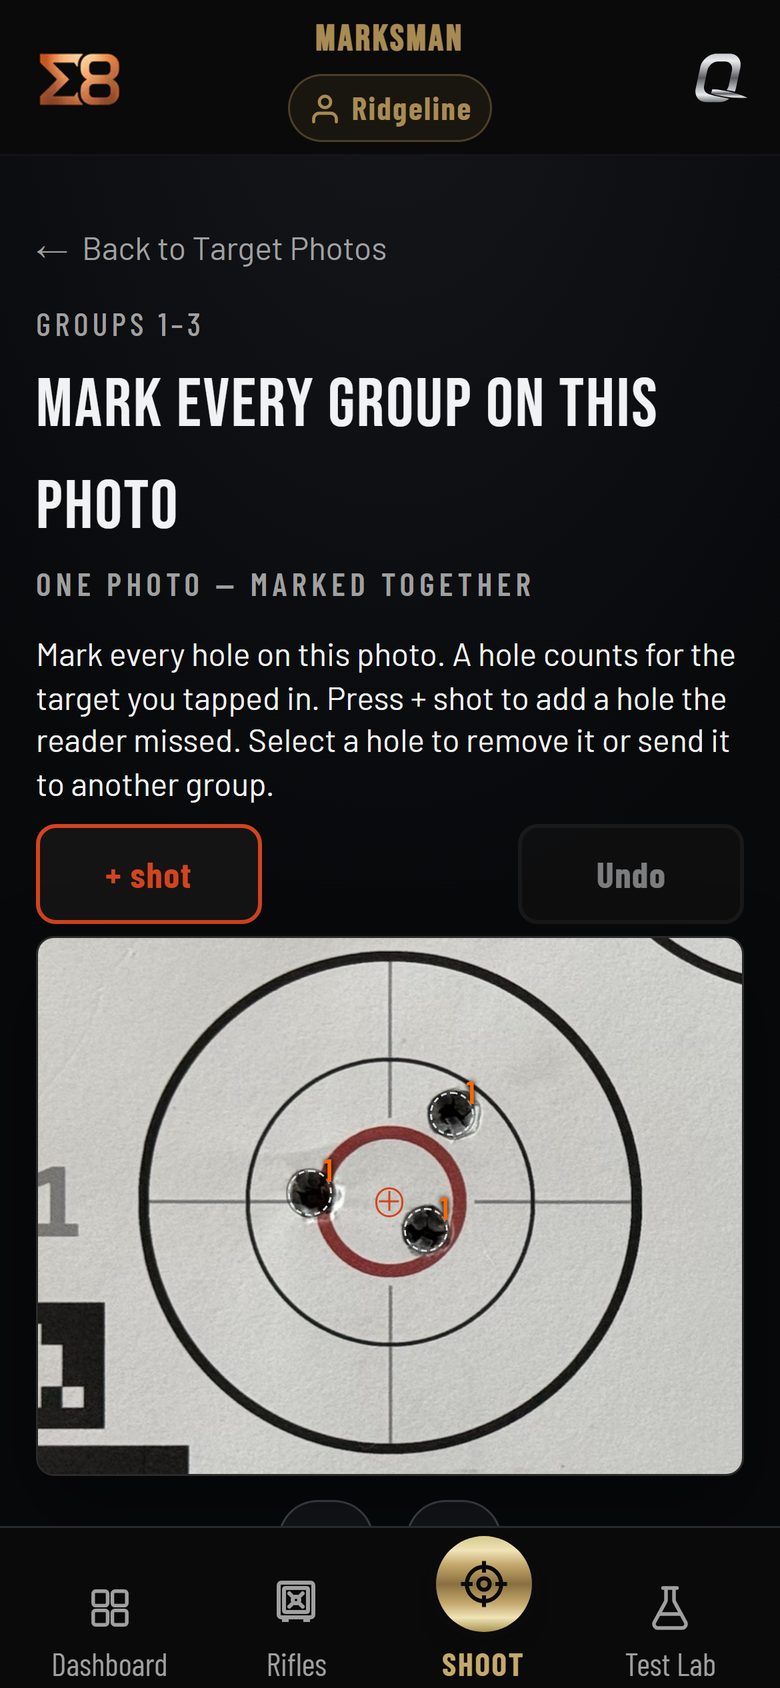
The marking screen on a phone: a fired Sigma8 target with three holes marked in Group 1, and the + shot and Undo buttons.
The marking screen. Qual8 found these three holes; + shot adds one it missed.

6

Read the result

The result opens by itself. Each group gets four numbers. Group Size, Mean radius and CEP read in inches and in MOA or MIL; Mean POI reads in inches, with its direction.

  • Group Size: the widest shot-to-shot distance.
  • Mean radius: average shot distance from the group center.
  • CEP (50%): the median shot radius around the center.
  • Mean POI: the calculated center of your group.

Press GROUP 1, GROUP 2 to look at one group alone. Save or share picture hands your phone a picture of what you are looking at.
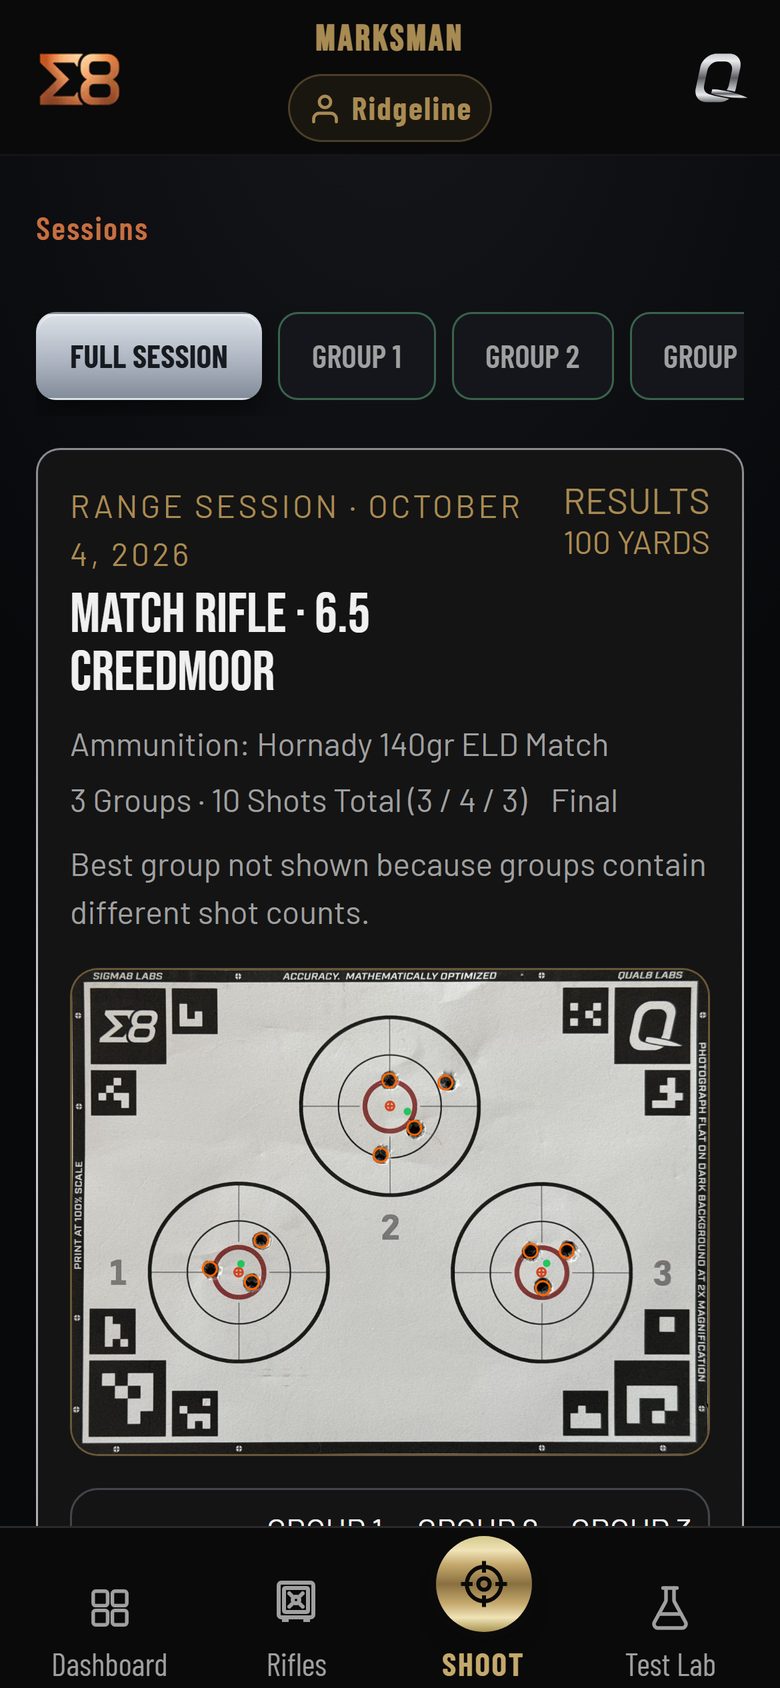
A finished Range Session result on a phone: the rifle, ammunition and distance, and the photographed three-group target with every hole marked.
The result: your target, with every hole marked.

7

Accept the results

Until you accept, the session is a draft. Look it over first.

  1. Something is off: press Edit Shot Mapping or Edit Velocities and fix it.
  2. When it is right, scroll to the bottom of the result and press FINALIZE SESSION, then ACCEPT RESULTS.

Why you check before you accept

Accepting is final. In the screen's words: "Once accepted, this session becomes part of your rifle history and barrel life record. Results cannot be edited, discarded, or deleted later."
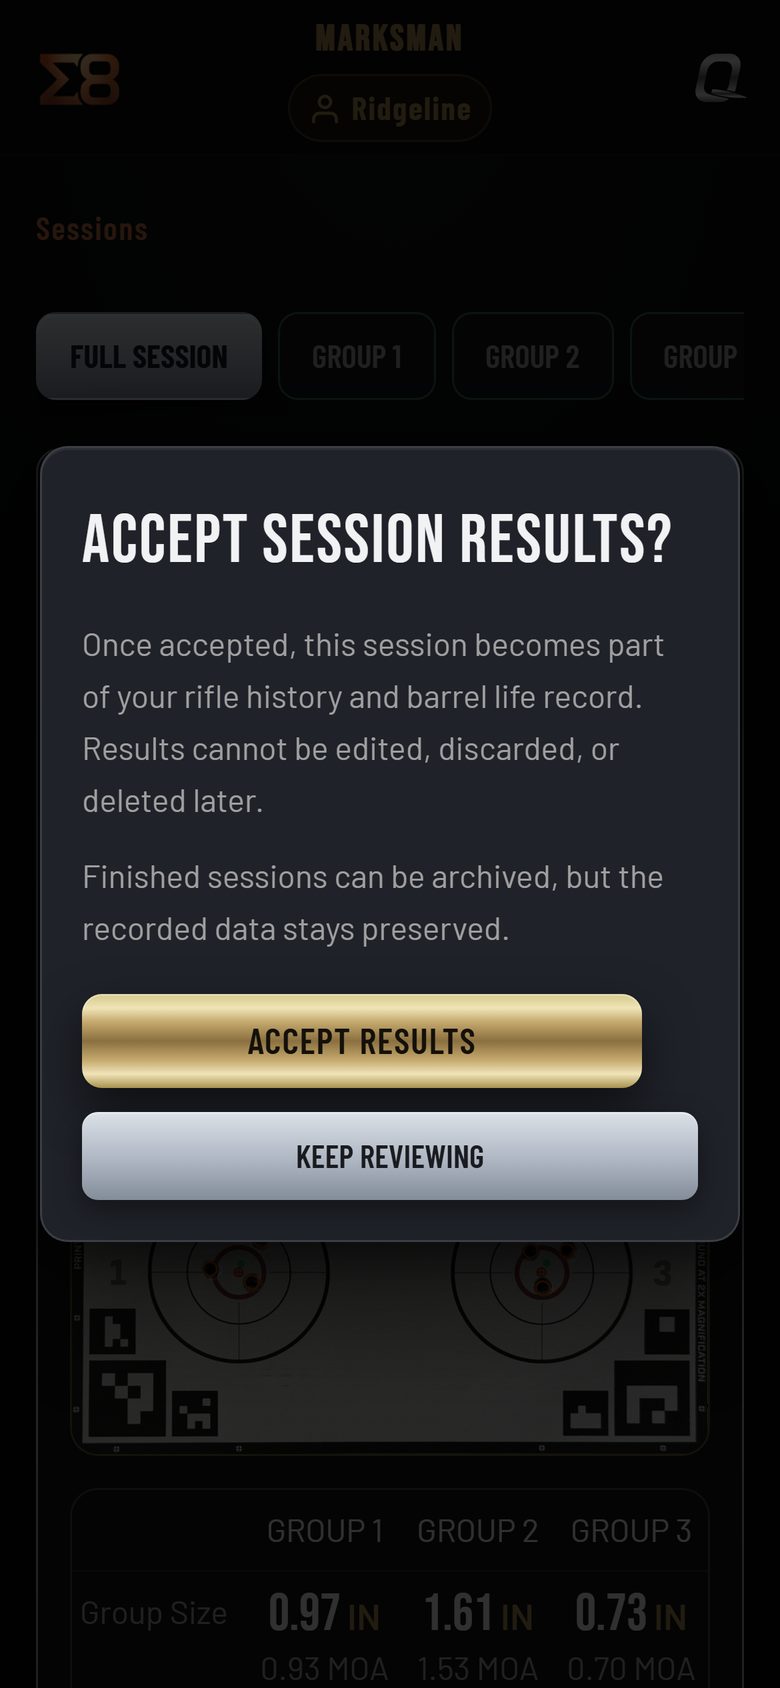
The Accept Session Results question on a phone, with the ACCEPT RESULTS and KEEP REVIEWING buttons.
The last question before the session joins the rifle's record.

8

Find it again

  • Dashboard, then FINISHED SESSIONS: every session you have finished.
  • Rifles, then the rifle: its best group sits at the top, and its barrel round count has gone up by the rounds you fired.

Why one session is only the start

One group is one result. Sessions saved to the same rifle show what that rifle and ammunition repeat.
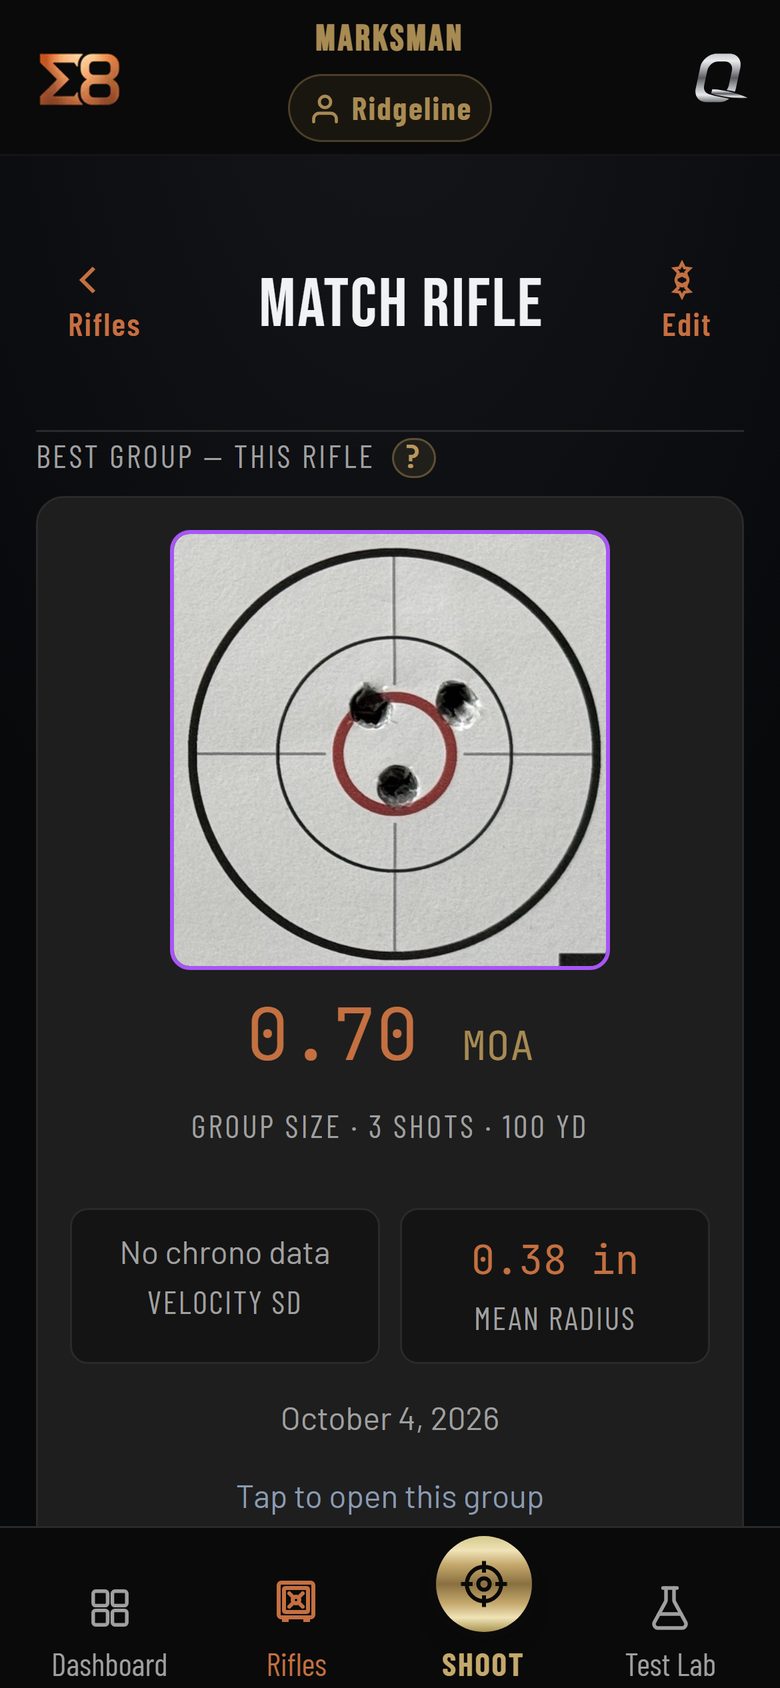
The rifle's page on a phone after one session: its best group, the barrel round count and the sections for specs, ammunition and history.
The rifle's page after one session. Best group at the top; barrel round count below.

Next: what else your plan does

Go back to your plan's guide for the next chapter.

Qual8 technology is patent pending in the United States